User Guide
 Our Goal
ScoopBook is built to help journalists efficiently manage the contacts of their sources, witnesses, and other key individuals they interact with on the job.
 Target Audience
ScoopBook is designed for journalists who need a fast, efficient and offline way to manage sources and contacts. We assume that these journalists are comfortable with the keyboard, but no technical background is required.
 Problems We’re Solving
- Traditional contact apps (like those on mobile phones) often have clunky interfaces that make it difficult for journalists to handle large number of contacts, sources and witnesses.
- Journalists frequently juggle multiple tools just to do simple tasks (like saving a contact or jotting down notes) wasting valuable time when the next big scoop is on the line.
 How does ScoopBook work?
ScoopBook is a desktop app designed with journalists in mind. It combines the speed and precision of a Command Line Interface (CLI) with the ease of a Graphical User Interface (GUI)—so if you can type fast, you can work fast.
With ScoopBook, you get:
- Blazing-fast contact entry: Offering a Typing-based interface.
- Smart categorization of contacts (e.g. sources, leads, officials)
- Powerful, instant search to find the right sources, right contacts, fast.
 Table of Contents
- Our Goal
- Target Audience
- Problems We’re Solving
- How does ScoopBook work?
- Table of Contents
- Quick start
-
Features
- Viewing help :
help - Adding a person:
add - Listing all persons :
list - Editing a person :
edit - Locating persons by name:
find - Deleting a person :
delete - Adding tags to a contact:
addtag - Removing tag from a contact:
removetag - Finding people with tags:
findtag - Opening Note for Person:
note - Deleting Note from Person:
deletenote - Clearing all entries :
clear - Exporting your contacts:
export - Importing your contacts:
import - Exiting the program :
exit - Saving the data
- Editing the data file
- Viewing help :
- FAQ
- Known issues
- Command summary
Quick start
-
Ensure you have Java
17or above installed in your Computer.
Mac users: Ensure you have the precise JDK version prescribed here. -
Download the latest
.jarfile from here. -
Copy the file to the folder you want to use as the home folder for your ScoopBook.
-
Open a command terminal,
cdinto the folder you put the jar file in, and use thejava -jar ScoopBook.jarcommand to run the application.
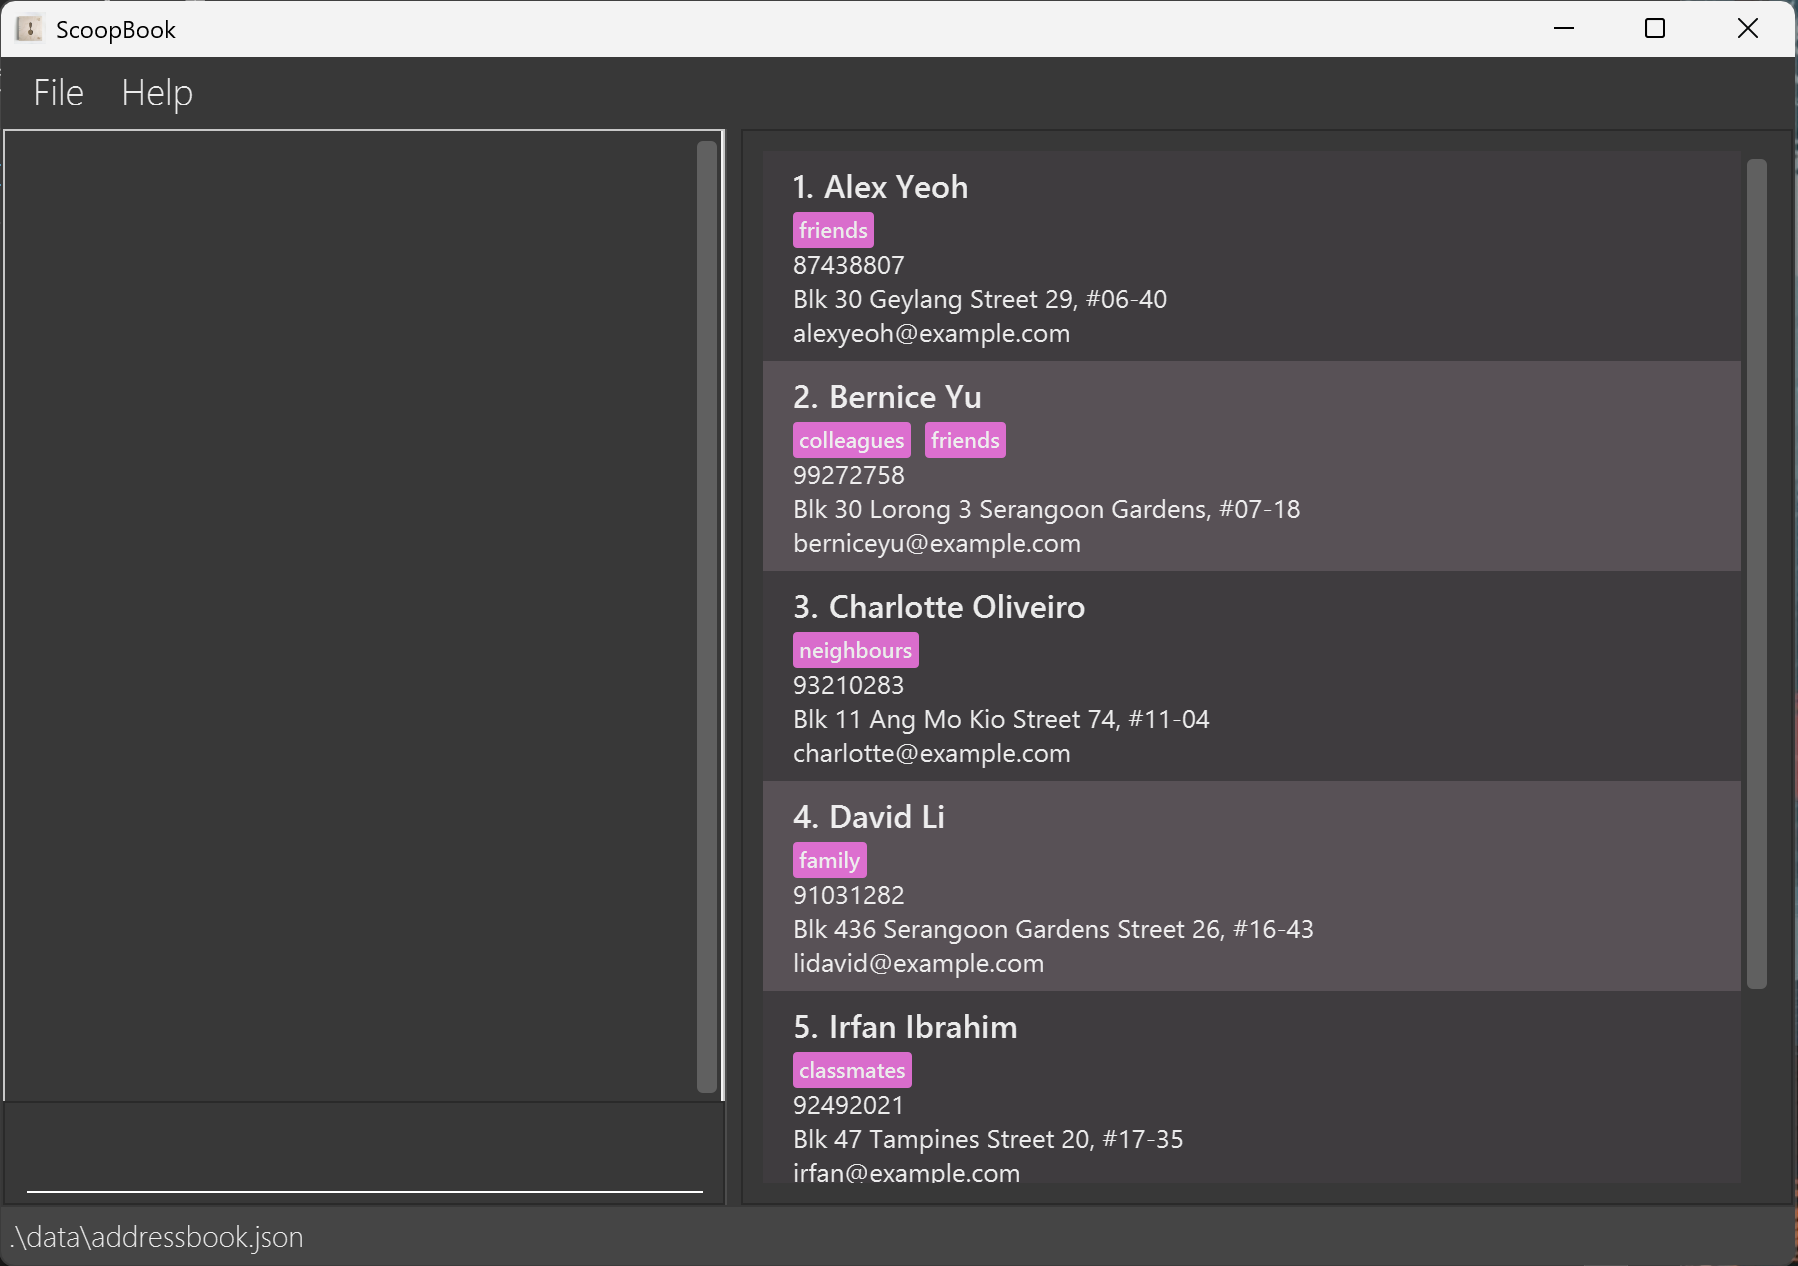
A GUI similar to the below should appear in a few seconds. Note how the app contains some sample data.
-
Type the command into the command box and press
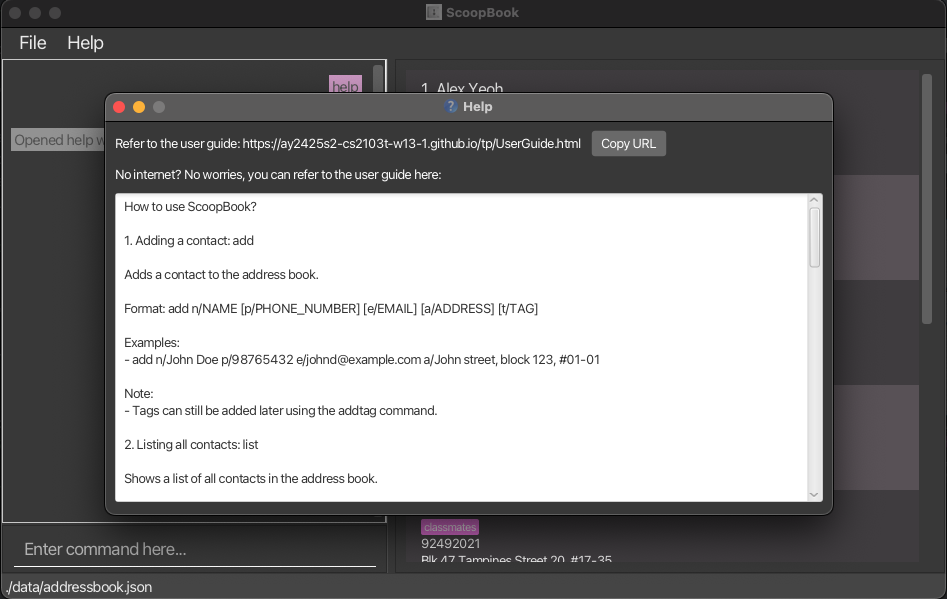
Enterto execute it. e.g. typinghelpand pressingEnterwill open the help window.
Here are some example commands you can try:-
list: Lists all contacts. -
add n/John Doe p/98765432 e/johnd@example.com a/John street, block 123, #01-01: Adds a contact namedJohn Doeto the address book. -
delete 3: Deletes the 3rd contact shown in the current list. -
clear: Deletes all contacts. -
exit: Exits the app.
-
-
Refer to the Features below for details of each command.
Features
![]() Notes about the command format:
Notes about the command format:
-
Commands are case-sensitive.
e.g.LISTcommand will not work. -
Words in
UPPER_CASEare the parameters to be supplied by the user.
e.g. inadd n/NAME,NAMEis a parameter which can be used asadd n/John Doe. -
Items in square brackets are optional.
e.gn/NAME [t/TAG]can be used asn/John Doe t/friendor asn/John Doe. -
Items with
… after them can be used multiple times including zero times.
e.g.[t/TAG]…can be used ast/friend,t/friend t/familyetc. -
Parameters can be in any order.
e.g. if the command specifiesn/NAME p/PHONE_NUMBER,p/PHONE_NUMBER n/NAMEis also acceptable. -
Extraneous parameters for commands that do not take in parameters (such as
help,list,exitandclear) will be ignored.
e.g. if the command specifieshelp 123, it will be interpreted ashelp. -
If you are using a PDF version of this document, be careful when copying and pasting commands that span multiple lines as space characters surrounding line-breaks may be omitted when copied over to the application.
Viewing help : help
Shows the user guide, containing instructions on how to use the command.
help
Adding a person: add
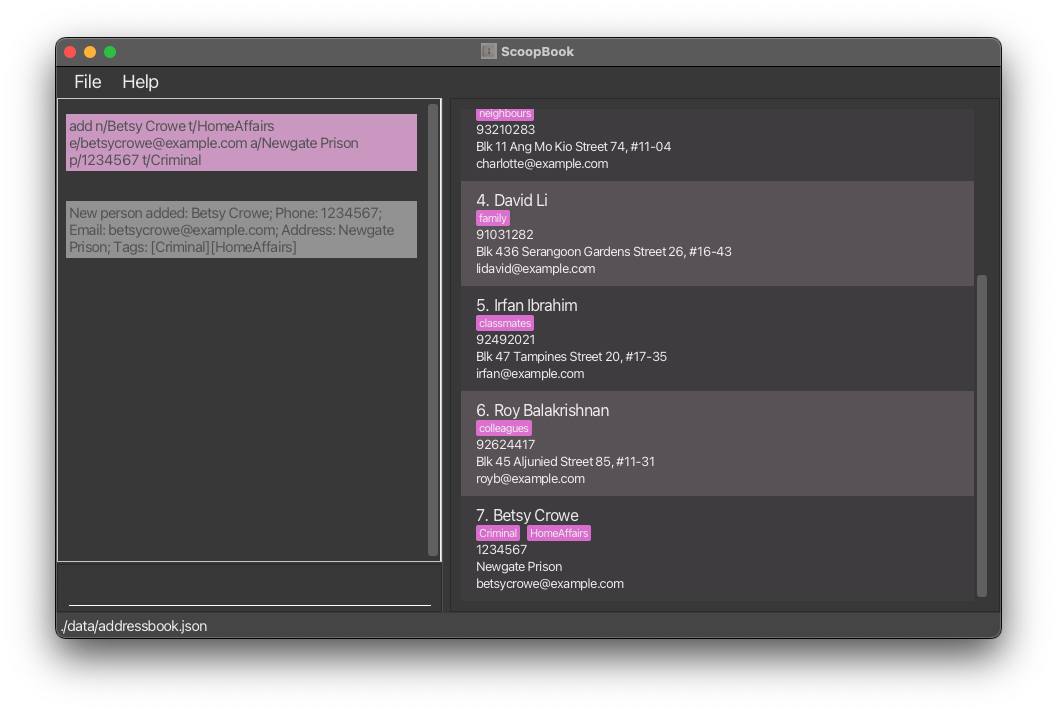
Adds a person to the address book.
add n/NAME [p/PHONE_NUMBER] [e/EMAIL] [a/ADDRESS] [t/TAG] [t/MORE_TAGS]
![]() Note:
Note:
- The add command must have a name, and one of the following fields: phone number, email, address.
i.e.
add n/Johnny Appleseeddoes not work because there is no phone number, email or address. - A person can have any number of tags (including 0).
- A person’s name can only contain alphanumeric characters (numbers or letters only), whitespaces, and the following special characters:
,,(,),@,.,-,'. - A person’s tags can only contain alphanumeric characters (numbers or letters only, no special characters).
- If a contact is added with the following values, they will not be displayed in the contact list, as they are used as internal placeholders:
- Phone Number:
000 - Email:
unknown@example.com - Address:
Unknown address
This ensures that every contact has a placeholder value for these fields if left empty.
- Phone Number:
![]() Examples:
Examples:
add n/John Doe p/98765432 e/johnd@example.com a/John street, block 123, #01-01add n/Betsy Crowe t/Witness e/betsycrowe@example.com a/Newgate Prison p/1234567 t/Criminal
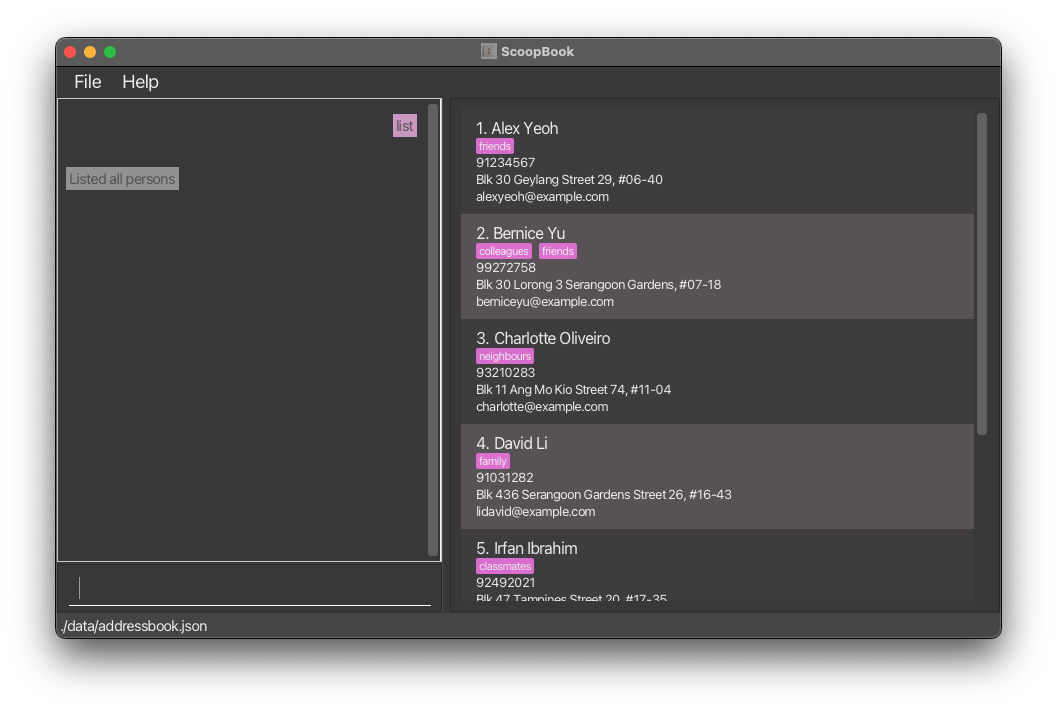
Listing all persons : list
Shows a list of all persons in the address book.
list
Editing a person : edit
Edits an existing person in the address book at specified index.
edit INDEX [n/NAME] [p/PHONE_NUMBER] [e/EMAIL] [a/ADDRESS] [t/TAG] [t/MORE_TAGS]
![]() Note:
Note:
- Edits the person at the specified
INDEX. The index refers to the index number shown in the displayed person list. The index must be a positive integer 1, 2, 3, … - At least one of the optional fields must be provided.
- Existing values will be updated to the input values.
- When editing tags, the existing tags of the person will be removed i.e adding of tags is not cumulative.
- Similar to the
addcommand, the aforementioned placeholder values will not be displayed in the contact list.
![]() TIP: You can remove all the person’s tags by typing
TIP: You can remove all the person’s tags by typing edit INDEX t/ without specifying any tags after it.
![]() Examples:
Examples:
-
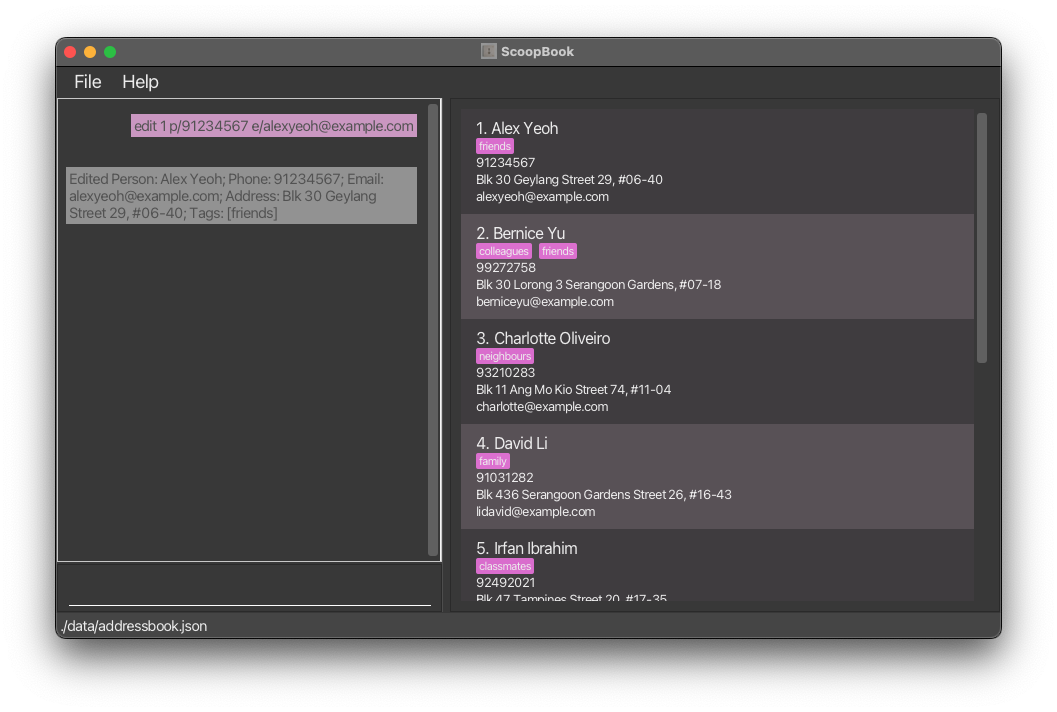
edit 1 p/91234567 e/johndoe@example.comEdits the phone number and email address of the 1st person to be91234567andjohndoe@example.comrespectively. -
edit 1 t/friends t/colleaguesRemoves all existing tags of the 1st person, and sets the 1st person’s tag tofriendsandcolleaguesonly. -
edit 2 n/Betsy Crower t/Edits the name of the 2nd person to beBetsy Crowerand clears all existing tags.
Locating persons by name: find
Finds persons whose names contain any of the given keywords.
find KEYWORD [MORE_KEYWORDS]
![]() Note:
Note:
- The search is case-insensitive. e.g
hanswill matchHans - The order of the keywords does not matter. e.g.
Hans Bowill matchBo Hans - Only the name is searched.
- Only full words will be matched e.g.
Hanwill not matchHans - Persons matching at least one keyword will be returned (i.e.
ORsearch). e.g.Hans Bowill returnHans Gruber,Bo Yang
![]() Examples:
Examples:
-
find JohnreturnsjohnandJohn Doe -
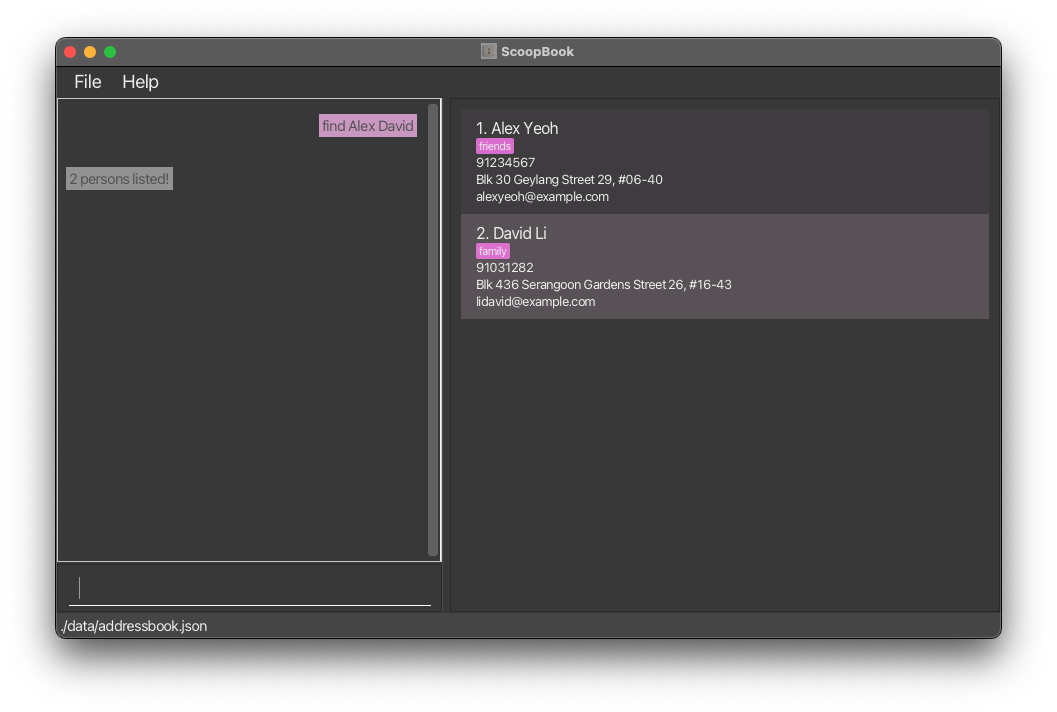
find alex davidreturnsAlex Yeoh,David Li
Deleting a person : delete
Deletes the specified person from the address book.
delete INDEX
![]() Note:
Note:
- Deletes the person at the specified
INDEX. - The index refers to the index number shown in the displayed person list.
- The index must be a positive integer 1, 2, 3, …
![]() Examples:
Examples:
-
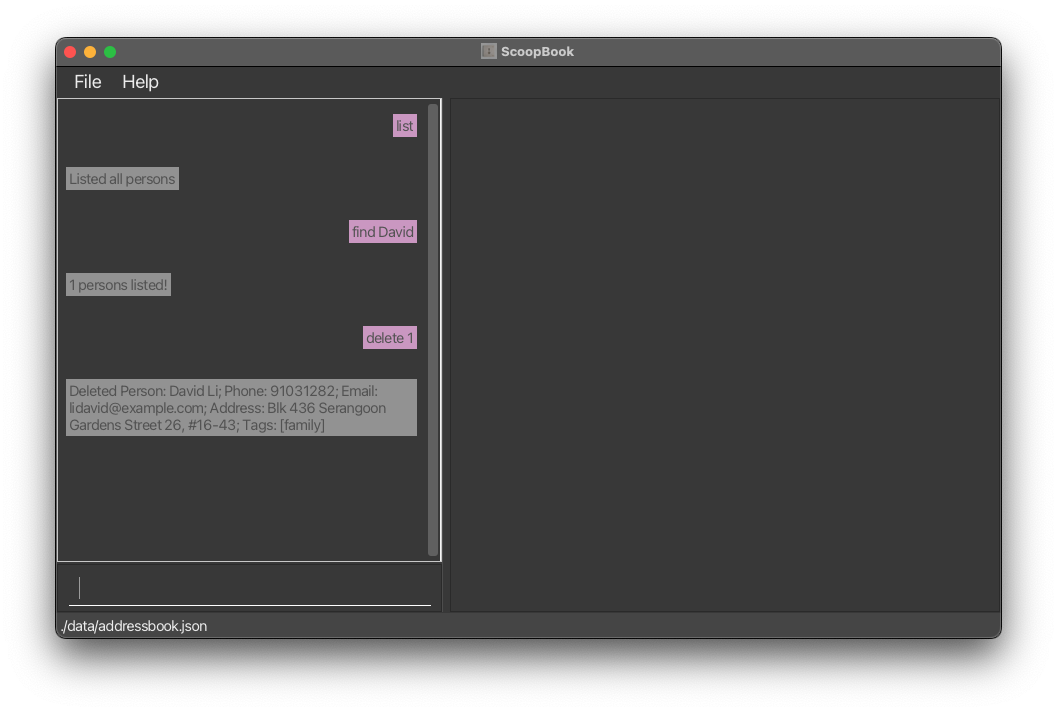
listfollowed bydelete 2deletes the 2nd person in the address book. -
find Betsyfollowed bydelete 1deletes the 1st person in the results of thefindcommand.
Adding tags to a contact: addtag
Adds the tag(s) typed in to the specified person.
addtag INDEX t/TAG1 [t/MORE_TAGS]
![]() Note:
Note:
- Adds the specified tags to the person at the specified
INDEX. - The index refers to the index number shown in the displayed person list.
- The index must be a positive integer 1, 2, 3, …
- Multiple tags in a single
addtagcommand is supported. i.e.addtag 1 t/Witness t/HomeAffairswill tag the 1st person with both “Witness” and “HomeAffairs”. - Tags can only contain alphanumeric characters (numbers or letters only, no special characters or spaces).
- Tags are case-sensitive.
i.e.
addtag 1 t/Witnesswill add the tag “Witness” whileaddtag 1 t/witnesswill add the tag “witness”.
![]() Examples:
Examples:
-
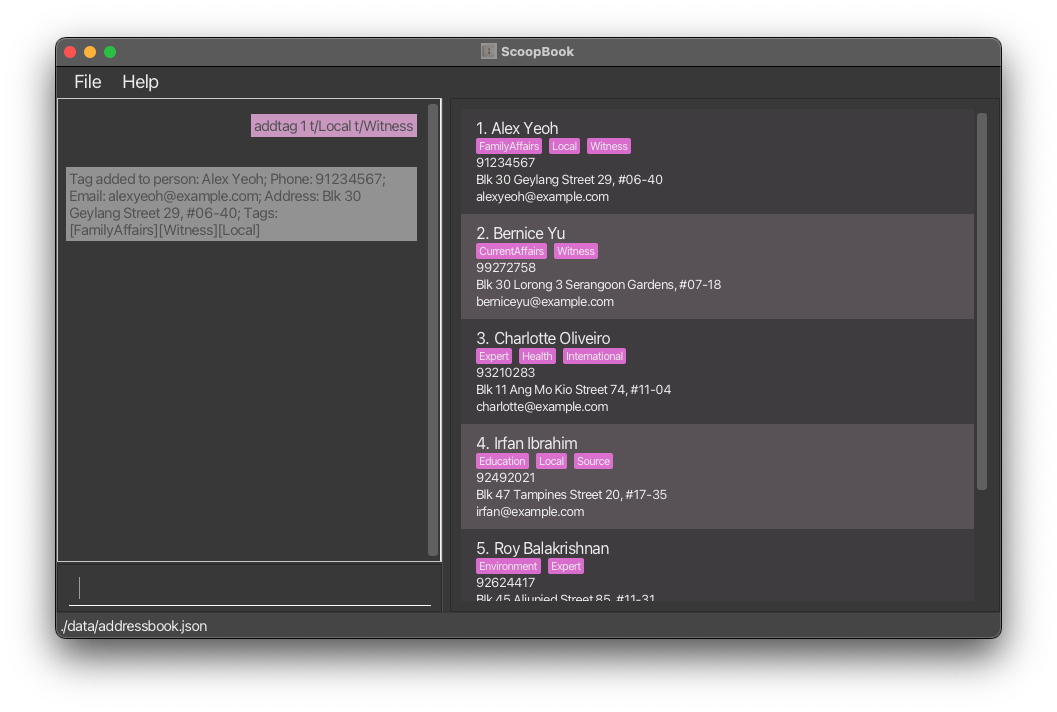
listfollowed byaddtag 2 t/Educationtags the 2nd person with “Education” in the address book. -
find Betsyfollowed byaddtag 1 t/Victimtags the 1st person in the results of thefindcommand with “Victim”.
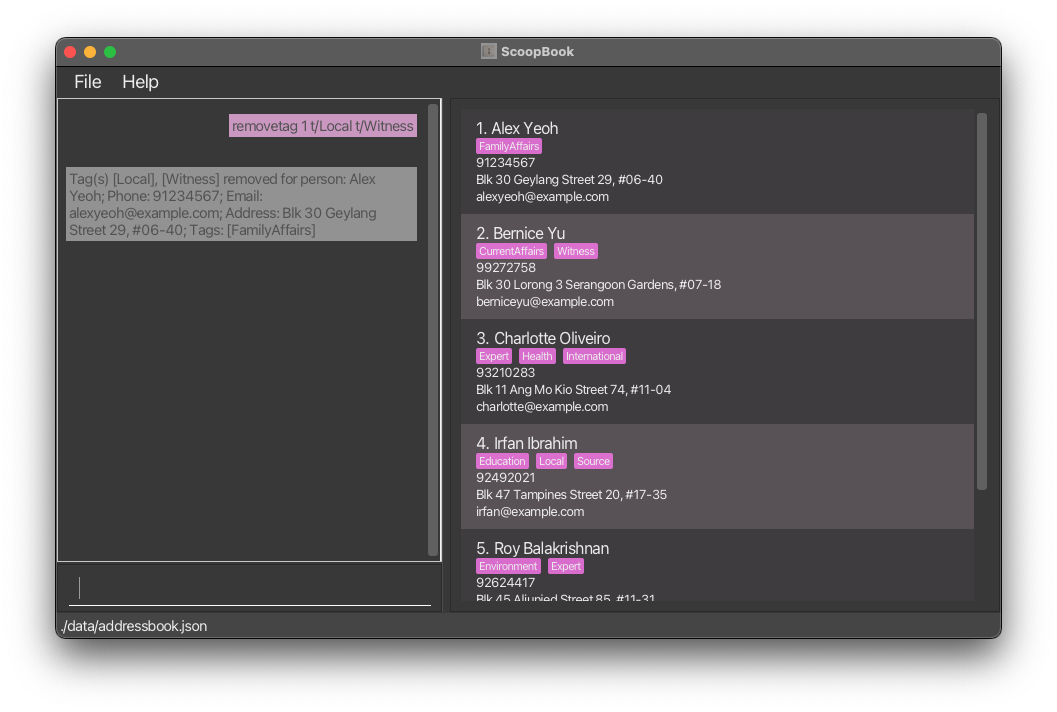
Removing tag from a contact: removetag
Removes the specified tag(s) from the specified person.
removetag INDEX t/TAG1 [t/MORE_TAGS]
![]() Note:
Note:
- Removes the specified tags from the person at the specified
INDEX. - The index refers to the index number shown in the displayed person list.
- The index must be a positive integer 1, 2, 3, …
- Multiple tags in a single
removetagcommand is supported. i.e.removetag 1 t/Witness t/Localwill remove both the “Witness” and “Local” tag for the 1st person. - Tags are case-sensitive. The typed tag must match the tag on the person exactly.
i.e.
removetag 1 t/witnesswill not remove the tag “Witness”.
![]() TIP: Use
TIP: Use edit INDEX t/ instead to remove all tags for specified contact.
![]() Examples:
Examples:
-
listfollowed byremovetag 2 t/friendremoves the “friend” tag from the 2nd person in the address book. -
find Betsyfollowed byremovetag 1 t/friendremoves the “friend” tag from the 1st person in the results of thefindcommand.
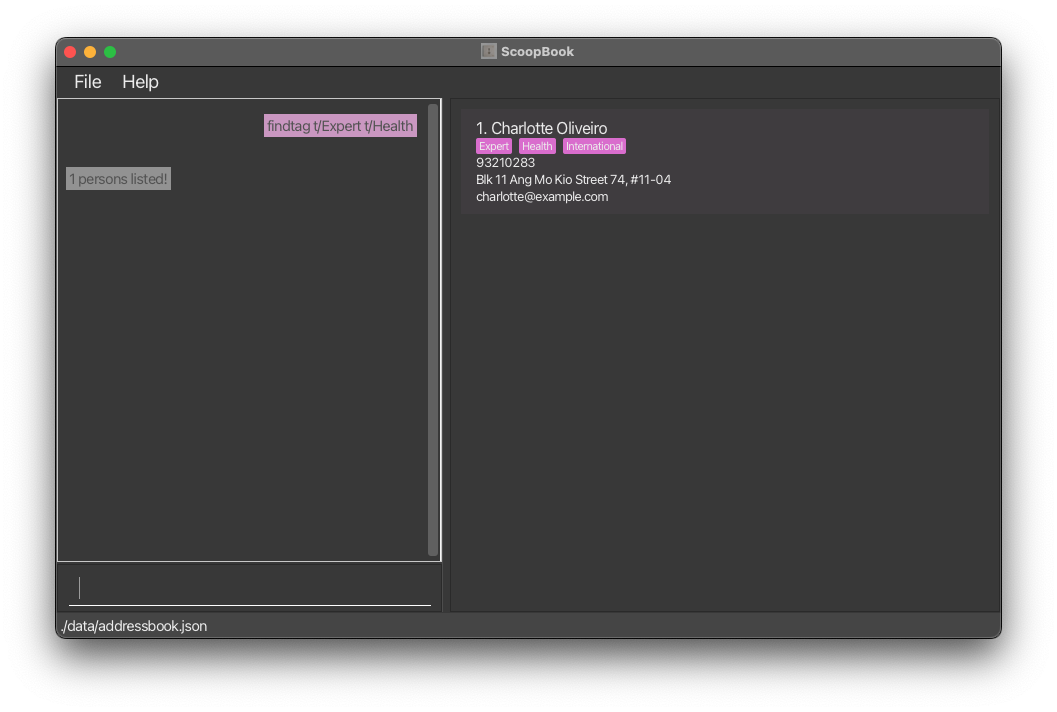
Finding people with tags: findtag
Find persons who have all the specified tags.
findtag t/TAG1 [t/MORE_TAGS]
![]() Note:
Note:
- The searching of tags is case-insensitive. e.g
friendswill matchFriends - The order of the tags does not matter. i.e. As long as the person has the listed tags, they will be shown.
- Only the tags are searched.
- Only full words will be matched e.g.
Friendwill not matchFriends - Only persons matching all the tags will be returned (i.e.
ANDsearch).
![]() Examples:
Examples:
-
findtag t/witnessreturns people with tagwitness,Witness,WitNeSs(due to case insensitivity). -
findtag t/Witness t/HomeAffairsreturns people with tagWitnessandHomeAffairsonly.
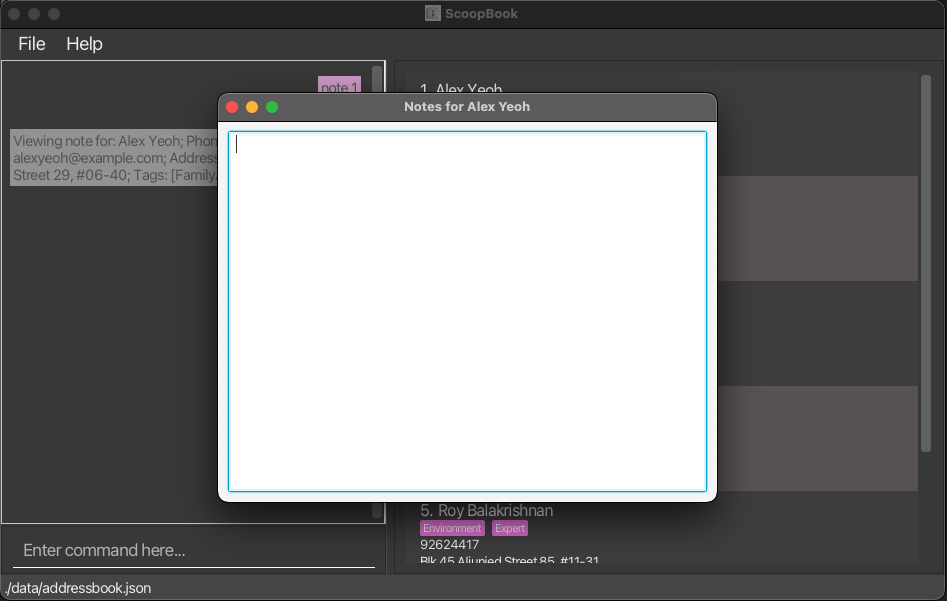
Opening Note for Person: note
Open a window for the user to add notes to.
If the person at the specified INDEX already has a note, the note will be displayed and the user can edit it in the window.
If no note exists for the person, a new note will be created and displayed in the window for editing.
note INDEX
![]() Note:
Note:
- Opens a window for the user to add notes to the person at the specified
INDEX.-
 Please use only this opened window to edit the note (see #Known issues section below)
-
- The index refers to the index number shown in the displayed person list.
- The index must be a positive integer 1, 2, 3, …
- The note will be saved when the window is closed.
![]() Examples:
Examples:
-
listfollowed bynote 2opens a note window for the 2nd person in the address book. -
find Betsyfollowed bynote 1opens a note window for the 1st person in the results of thefindcommand.
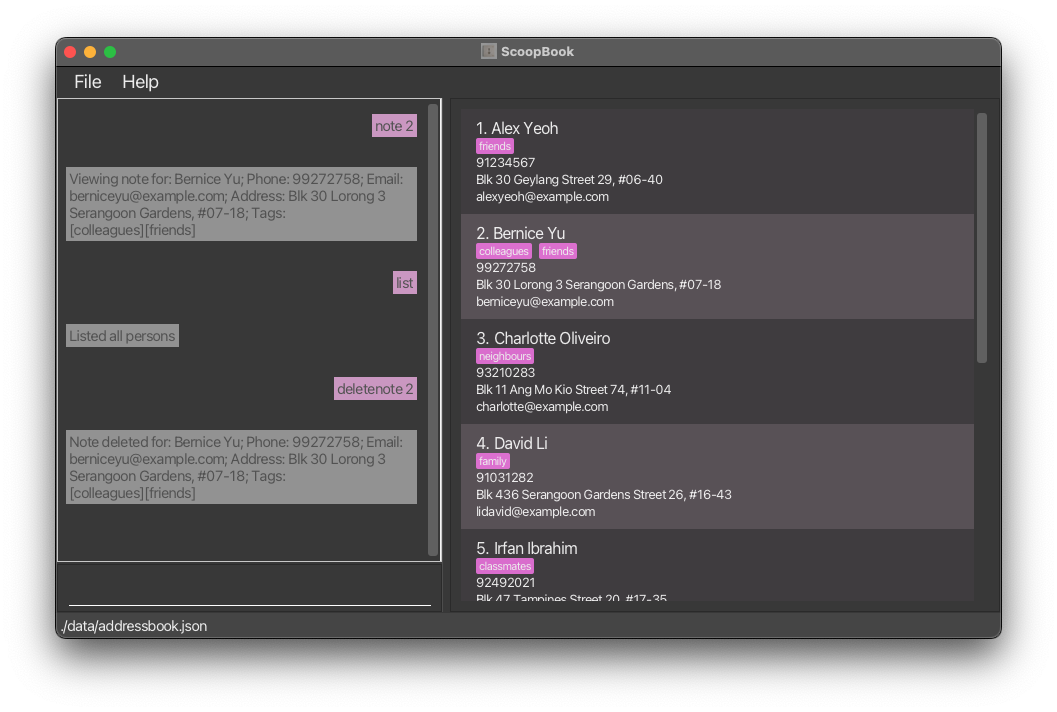
Deleting Note from Person: deletenote
Deletes the note from the person.
deletenote INDEX
![]() Note:
Note:
- Deletes note for the person at the specified
INDEX. - The index refers to the index number shown in the displayed person list.
- The index must be a positive integer 1, 2, 3, …
![]() Examples:
Examples:
-
listfollowed bydeletenote 2deletes the note for the 2nd person in the address book, if the note exists. -
find Betsyfollowed bydeletenote 1deletes the note for the 1st person in the results of thefindcommand, if the note exists.
Clearing all entries : clear
Clears all entries from the address book.
clear
.txt files from the address book.
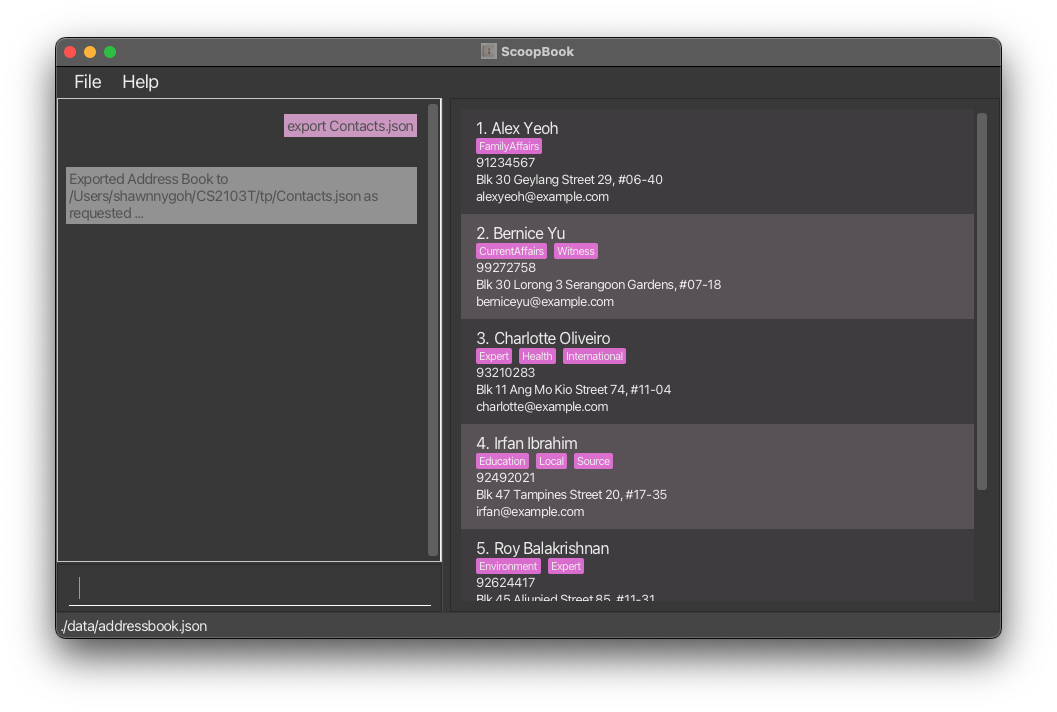
Exporting your contacts: export
Exports the contacts in a .json file to the target path.
export TARGET_PATH
![]() Note:
Note:
- The
exportcommand only exports your contacts. It does not export the notes tagged to them. - Before executing the
exportcommand, add at least 1 contact using theaddcommand. -
exportcommand is case-insensitive. IfsAmPle.jsonalready exists (in the folder theScoopBook.jaris located at),export sample.jsonwill overwritesAmPle.json. - Ensure that there are no special characters (E.g.
*!<>) or spaces in theTARGET_PATH.
![]() TIP: If you are running into issues with TARGET_PATH, use
TIP: If you are running into issues with TARGET_PATH, use export sample.json to export it directly to the root folder with of the ScoopBook.jar file. Then, move the .json file to wherever you want it to be.
![]() Examples:
Examples:
- For Windows:
export C:/Users/username/Desktop/MyContacts.json- saves the json file as
MyContacts.jsonin theUsers/username/Desktopfolder.
- saves the json file as
- For macOS:
export /Users/username/Desktop/MyContacts.json- saves the json file as
MyContacts.jsonin theUsers/username/Desktopfolder.
- saves the json file as
- For Linux:
export /home/user/desktop/MyContacts.json- saves the json file as
MyContacts.jsonin thehome/user/desktopfolder.
- saves the json file as
- For all OS:
export Contacts.json- saves the json file as
Contacts.jsonin the root folder of whereScoopBook.jaris located at.
- saves the json file as
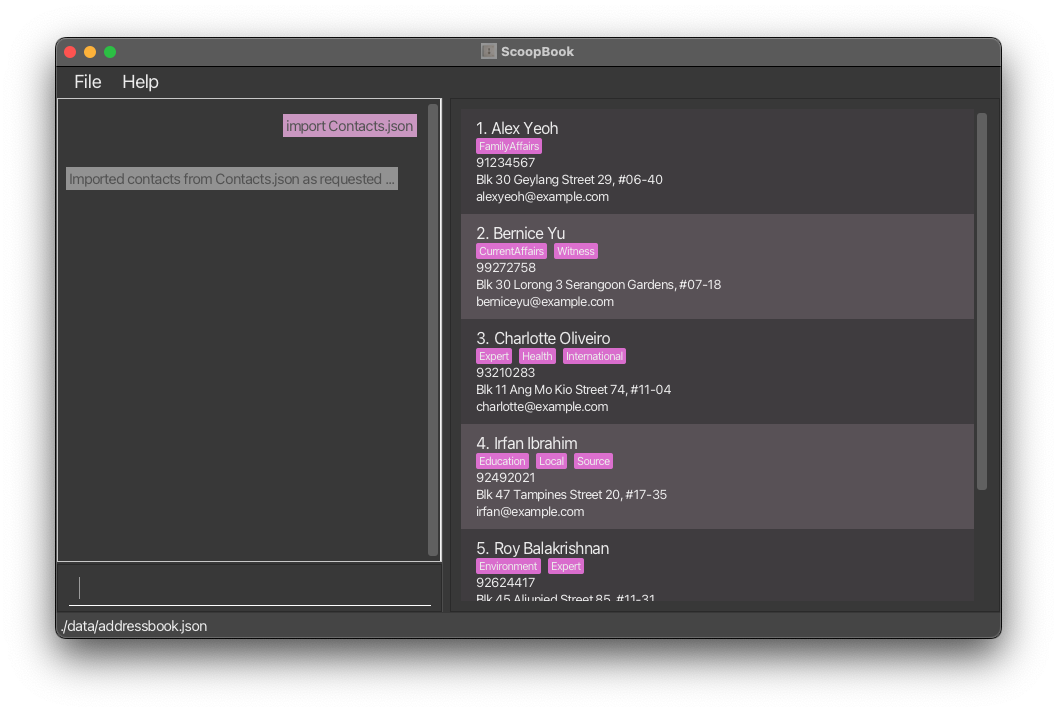
Importing your contacts: import
Imports contacts from the external .json file located at the specified path into the application.
import TARGET_PATH
![]() Note:
Note:
- Only import .json files exported using the
exportcommand. - Ensure that there are no special characters (E.g.
*!<>) or spaces in theTARGET_PATH.
![]() Examples:
Examples:
- For Windows:
import C:/Users/username/Desktop/MyContacts.jsonimports the json file fromMyContacts.jsonin theUsers/username/Desktopfolder. - For macOS:
import /Users/username/Desktop/MyContacts.jsonimports the json file fromMyContacts.jsonin theUsers/username/Desktopfolder. - For Linux:
import /home/user/desktop/MyContacts.jsonimports the json file fromMyContacts.jsonin thehome/user/desktopfolder. -
import Contacts.jsonimports the json file namedContacts.jsonfrom the root folder of where ScoopBook.jar is located at.
Exiting the program : exit
Exits the program.
exit
Saving the data
ScoopBook data are saved in the hard disk automatically after any command that changes the data. There is no need to save manually.
Editing the data file
ScoopBook data are saved automatically as a JSON file [JAR file location]/data/addressbook.json. Advanced users are welcome to update data directly by editing that data file.
Unsure where to find the JSON file? No worries! Follow these instructions:
- In ScoopBook, type the following command:
export temp.json -
temp.jsonwill be saved in your JAR file location. Open it in an editor of your choice. - Edit the fields while adhering to the format of the file. Save the JSON file.
- In ScoopBook, type the following command:
import temp.json - Done!
Furthermore, certain edits can cause the ScoopBook to behave in unexpected ways (e.g., if a value entered is outside of the acceptable range). Therefore, edit the data file only if you are confident that you can update it correctly.
FAQ
![]() Q: How do I transfer my data to another Computer?
Q: How do I transfer my data to another Computer?
A: Install the app in the other computer and overwrite the empty data file it creates with the file that contains the data of your previous ScoopBook home folder.
![]() Q: What are considered duplicate contacts?
Q: What are considered duplicate contacts?
A: Duplicate contacts are contacts with names that match exactly. We do not allow the addition of duplicate contacts in our app. For example, John Doe and John Doe are considered duplicate contacts, and we will not allow the addition of the second contact if the first has already been added.
Names that differ in lower and upper case letters are not considered as duplicate contacts even if the same exact letters are used. For example, John Doe and john doe are not considered duplicate contacts.
Additionally, names with different amount of spaces between them are also not considered duplicate contacts. For example, John Doe and John Doe are not considered duplicate contacts.
This way, we leave room for flexibility in deciding contact names, with the bare minimum of preventing the addition of duplicates as specified.
![]() Q: Why didn’t my
Q: Why didn’t my add command work?
A: Ensure that you entered at least a name and one of the following: phone number, email, or address.
- Does your name contain special characters? Only whitespace,
,,(,),@,.,-,'are allowed.
![]() Q: Why didn’t my
Q: Why didn’t my edit, addtag, removetag delete note or deletenote command work?
A: Check your INDEX! Is your index within range?
![]() Q: My
Q: My import command did not work. What went wrong?
A: Make sure that the file was originally exported from ScoopBook. Do not import unrelated .json files or edit them outside of ScoopBook!
- Did you also check your filepath?
![]() TIP: If you are unsure, test with a sample
TIP: If you are unsure, test with a sample export first:
export temp.json
import temp.json
Known issues
-
When using multiple screens, if you move the application to a secondary screen, and later switch to using only the primary screen, the GUI will open off-screen. The remedy is to delete the
preferences.jsonfile created by the application before running the application again. -
If you minimize the Help Window and then run the
helpcommand (or use theHelpmenu, or the keyboard shortcutF1) again, the original Help Window will remain minimized, and no new Help Window will appear. The remedy is to manually restore the minimized Help Window. -
If you minimize the Note Window, and then run the
notecommand again, the original Note Window will remain minimized, and no new Note Window will appear. The remedy is to manually restore the minimized Note Window. - If you use any other means apart from the note window that ScoopBook opens to edit a note, (eg. notepad) we cannot guarantee that your edits will be saved. This may be because of an encoding incompatibility between your text editor and ScoopBook’s. Please use the note window that ScoopBook opens to edit the note.
- Text fields in the GUI: Currently, text fields that are too long may be cut off in the GUI. We will introduce scrolling as a feature to enable viewing these fields in full in future releases.
-
Adding a contact with placeholder values: Currently, we do not prevent the user from adding a contact with placeholder values. This is because we want to allow the user to add a contact with only a name and one other field, and we chose these placeholder values as unlikely values that would be used for a contact.
- Regardless, we acknowledge that this may lead to confusion as these contact fields deliberately added with placeholder values will not be displayed in the contact list. We will fix this in future releases.
-
Finding a contact: Currently, the
findcommand performs anORsearch. While all contacts matching at least one keyword will be returned, they are not sorted according to the highest similarity or match. We will improve this in future releases.
Command summary
| Action | Format, Examples |
|---|---|
| Add |
add n/NAME p/PHONE_NUMBER e/EMAIL a/ADDRESS [t/TAG]… e.g., add n/James Ho p/22224444 e/jamesho@example.com a/123, Clementi Rd, 1234665 t/Witness t/Local
|
| Clear | clear |
| Delete |
delete INDEXe.g., delete 3
|
| Edit |
edit INDEX [n/NAME] [p/PHONE_NUMBER] [e/EMAIL] [a/ADDRESS] [t/TAG]…e.g., edit 2 n/James Lee e/jameslee@example.com
|
| Find |
find KEYWORD [MORE_KEYWORDS]e.g., find James Jake
|
| Add Tag |
addtag INDEX t/TAG1 [t/MORE_TAGS]… e.g., addtag 2 t/Witness
|
| Find Tag |
findtag t/TAG1 [t/MORE_TAGS]… e.g., findtag t/Witness
|
| Remove Tag |
removetag INDEX t/TAG1 [t/MORE_TAGS]… e.g., removetag 2 t/Witness
|
| Note |
note INDEX e.g., note 2
|
| Delete Note |
deletenote INDEX e.g., deletenote 3
|
| Export Contacts |
export TARGET_PATH e.g., export backup.json
|
| Import Contacts |
import TARGET_PATH e.g., import previousVer.json
|
| List | list |
| Help | help |